Tuesday, February 26, 2013

Snickerdoodle Brownies

Today I took the day off to visit some family up in Rescue before I make the big move up to Oregon this weekend. I was able to spend the evening with my Mom, Grandparents, Uncle D, and cousin Anthony. As always, it was great spending time with them and dinner/dessert was filled with lots of laughs!

Seeing as how I'd be spending some quality time with my family, I wanted to bake something very tasty. This time I tried my hand at making Snickerdoodle Brownies, and they turned out to be a crowd pleaser!

Please take note, I used Pampered Chef Brownie Pan for these brownies. If you don't have something like this, then a 9X13 inch pan will work.

I also made the brownies a little bit thinner, so I cut the baking time in half. I think next time I'll fill the pan with more batter for some extra brownie!


What you need:
- 2 2/3 cups flour
- 2 teaspoons baking powder
- 1 teaspoon salt
- 2 cups packed brown sugar
- 1 cup (aka 2 sticks) room temperature butter
- 2 eggs (room temperature)
- 1 tablespoon vanilla
- 2 tablespoons sugar
- 2 teaspoons ground cinnamon

What you do:

1. Preheat oven to 350 degrees and grease a 9X13 inch pan. Or if you have a brownie pan like me, go ahead and grease that.

2. Whisk together the flour (2 2/3 cups), baking powder (2 tsp), and salt (1 tsp). Set aside.

3. In a large bowl, beat together the brown sugar (2 cups), butter (1 cup), eggs (2),  and vanilla (1 tbsp) until smooth. Add the flour mixture into the egg mixture and beat until blended.


4. Spread batter evenly into pan. If using the brownie pan, you can use small ice cream scoop (or spoon) to place the batter evenly in each square. Then flatten out with your hand so the batter will fill the bottom.   

5. In a small bowl, combine the sugar (2 tbsp) and cinnamon (2 tsp).

6. Sprinkle mixture evenly over the batter.


7. Bake for 25-30 minutes (if making thin brownies and using the brownie pan, only bake for 12-13 minutes), or until surface springs back when pressed. Remove from heat and let brownies cool for a few minutes. While brownies are still warm, cut into squares. Enjoy the cinnamon-sugar scent that the brownies make and eat away or save for a family gathering!

Seeing as how I will miss my family, I'm very happy I got to spend the day with them. These brownies were fun to make for everyone and a great addition to our fun-filled evening! 

Sunday, February 24, 2013

Lappert's in Sausalito

Today Adam, Larissa, Chad, and I took a little adventure over to Sausalito and needless to say, it was a perfect day! The sun was out, the ferry ride was fun, the food was great, the shops were cute, and the dessert was wonderful!

Although ice cream isn't a baked good, it is definitely a sweet! Adam and I shared a small scoop of Bing Cherry Ice Cream. Basically it is vanilla ice cream with big chunks of bing cherries and chocolate chips. I could have done with a little more chocolate chips to even out the balance but it wasn't too bad! Oh and don't let the photo fool you...the ice cream scooper man did a great job of magically fitting a lot of ice cream into that little cup!

In all, Lappert's was the best thing to end a perfect day in Sausalito!


Sunday, February 17, 2013

Kettle Corn Cookies

Today, my parents hosted a 'Bon Voyage' party for Adam and I, since we will be moving up to Portland, Oregon in two weeks. I figured this would be a great time to make my Kettle Corn cookies! I've made them once before, and I was really happy to get the chance to make them for a second time.

The original recipe is actually a Buttered Popcorn Cookie recipe from the Smitten Kitchen Cookbook. It reminded me of the Kettle Corn Cookies that Trader Joe's has (very yummy by the way), so I figured I could make my very own Kettle Corn Cookies!

This time I had the help of my two furry friends, Juneau and Barack.


Popcorn (makes about 4-5 cups)
- 1/8 cup vegetable oil
- 1/8 cup sugar
- 1/2 cup popcorn
- 1/2 teaspoon salt **optional- add it if you like your kettle corn sweet and salty**

1. Heat the vegetable oil in a large pot over medium heat. Once hot, stir in the sugar and popcorn.

2. Cover, and shake the pot constantly to keep the sugar from burning. Once the popping has slowed once every 2-3 seconds, remove the pot from the heat, and continue to shake for a few minutes until the popping has stopped. 

3. Pour into a large bowl, and allow to cool.

4. Once cool, take out any unpopped kernels and/or burned popcorn.


Cookies (makes about 24 cookies)
- 1/2 cup butter, softened
- 1/2 cup packed light brown sugar
- 1/3 cup granulated sugar
- 1 large egg
- 1/2 teaspoon vanilla extract
- 1 1/4 cups all-purpose flour
- 1/2 teaspoon baking soda

1. Preheat oven to 350 degrees and line a cookie sheet with parchment paper.

2. In a large bowl, crean together the softened butter, brown sugar, granulated sugar, egg, and vanilla until smooth.


3. In a separate bowl, whisk the flour and baking soda together.

4. Stir in the dry ingredients into the butter-sugar mixture. Fold in the cooled popcorn so that it is evenly distributed through the batter. **There will seem like a lot of popcorn, and not a whole lot of dough, but don't worry! Just take time mixing it together, and it'll work. Don't be afraid to break up the popcorn pieces either!!**


5. Scoop out tablespoon-sized balls of dough (or use a small ice cream scoop). Bake cookies for 10-12 minutes, until the edges are light brown. 


6. When done, let the cookies sit on the sheet for a bit to get a little firm. Then either transfer them onto a cooling rack or eat away!!


Saturday, February 16, 2013

Dessert at Circa


Yesterday was my 24th birthday and part of the celebration included Adam taking me to Circa, a restaurant/lounge out in the Marina. Needless to say we had a great time, our whole meal was fantastic, and the dessert was out of this world!

I had the Black and White Bread Pudding, which included Jack Daniel's caramel sauce, vanilla gelato, and pecans. It all blended very well together and the bread pudding was incredibly moist! I was practically in heaven with every bite I took!  Oh and to top it off, it came out on fire! I think I was bouncing up and down like a little kid because it was so cool!


Adam also had a sinfully delicious dessert: Chocolate Liquid Cake with espresso ice cream and vanilla bean sauce. It practically melted in your mouth when you took a bite! Again, this dish blended very well together and there was a great balance of added crunch!


We left Circa feeling extremely full but very happy with our meal. Our desserts were the cherry on top!


Thursday, February 14, 2013

'Naked' Strawberry Cupcakes with Vanilla Frosting

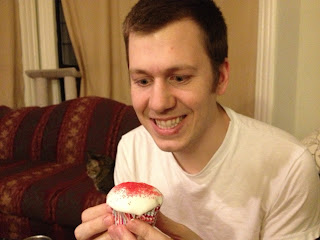
It was a given that I would bake something special for Valentine's Day. So last night I finally had the chance to make some cupcakes that I've never made before- strawberry cupcakes with vanilla frosting! I got this recipe from a cute little recipe box that I got from my boyfriend's family's Christmas gift exchange. It was definitely hard to narrow down which combination of cupcake and frosting to make, but I chose the strawberry cupcake since it had a 'Valentine's Day feel' to it. Overall they turned out great and I think for the first time in history, the cupcake itself was my favorite part!


Naked Strawberry Cupcakes (12 cupcakes)


- 2/3 cup fresh strawberries (unsurprisingly the grocery store was completely out of fresh strawberries, so I opted for the frozen ones...so those will work too. Just thaw them.)
- 1 1/2 cups flower
- 1 teaspoon baking powder
- 1/4 teaspoon salt
- 1/4 cup whole milk
- 1 teaspoon vanilla extract
- 1/2 cup butter
- 1 cup sugar
- 1 egg
- 2 egg whites

1. Preheat oven to 350 degrees and line muffin tin. Blend strawberries (2/3 cup) in a blender or food processor until pureed. Pulse in milk (1/4 cup) and vanilla (1 tsp).

2. In a small bowl, mix in the dry ingredients: flour (1 1/2 cups), baking powder (1 tsp), salt (1/4 tsp).

3. In a big mixing bowl, cream butter (1/2 cup) and sugar (1 cup) until fluffy, then slowly add egg and both egg whites. 

4. Add half the flour mixture, then the strawberry mixture, then the rest of the flower mixture, until just blended.


5. Divide batter evenly in muffin tin and bake for 22-25 minutes. **Stick a knife in one of the center cupcakes, if it comes out clean, then it's done!**


Simply Vanilla Frosting (frosts 12 cupcakes...maybe more)


- 3 egg whites
- 2 teaspoons corn syrup
- 1/2 teaspoon cream of tartar
- 1/3 cup cold water
- 1 1/2 cups sugar
- 1 teaspoon vanilla extract

1. In a large metal (or glass) mixing bowl, combine all of the ingredients.

2. Place bowl over a medium saucepan filled with 2 inches of water over medium high heat (bowl shouldn't touch the water). With a handheld mixer, beat on high speed until stiff peaks form, about 5-6 minutes.


3. Remove from heat and beat for 2-3 minutes to cool

4. When both cupcakes and frosting are cool, frost the cupcakes and have a feast!!


Thursday, February 7, 2013

Chocolate Fudge Brownie

Not only will I be posting recipes here, but I will also be sharing some sinfully delicious desserts that I come across...

Thursday night is girls night, so I spent this wonderful evening with my dear friend Anusha! After eating some yummy Japanese food downtown, we realized that we NEEDED to eat something sweet. We decided to go over to Max's at the Opera, since they serve some delicious desserts!

Anusha got the Niagara Falls Cake Slice (you can see it in the photo below) - chocolate cake with buttercream icing that's covered in chocolate ganache. It was rich and delicious!

I ended up with a huge honkin' Chocolate Fudge Brownie. It was everything heavenly on a plate- a big brownie, lots of vanilla ice cream, hot fudge, and marshmallow cream.


Needless to say, this made me feel fat and happy.


And maybe one day I'll make my very own homemade Chocolate Fudge Brownie!

Sunday, February 3, 2013

Chocolate Dipped Peanut Butter Cookies

Welcome to my first post!

Ever since I got a jar of chunky peanut butter from Target from about a few weeks ago, I've been wanting to make some peanut butter cookies. Finally, Super Bowl Sunday has given me the perfect opportunity to make some delicious peanut butter cookies, especially because the 49ers were in it this year!

Usually when I have a peanut butter cookie, they're hard and don't exactly have a whole lot of crunch to them. So I did a little bit of researching, and found a 'Soft Peanut Butter Cookies' recipe from food.com. It looked do-able, but I also felt that I needed to make it my own. So instead of having creamy peanut butter, I made these cookies with crunchy peanut butter. Not only that, but I dipped these cookies in chocolate to add a little extra oomph! Needless to say...I am very proud of what I made and they turned out to be a hit!

Here is what you need:

-1 cup  chunky peanut butter
-1 cup packed brown sugar
-1 cup white sugar
- 2 eggs
-1 cup butter (softened)
-1 teaspoon baking soda
-1 teaspoon baking powder
-1 teaspoon vanilla extract
-2 1/2 cups flour
-1 1/2 cups semi-sweet chocolate chips

(makes about 35 cookies)

Here is what you do:

1. Preheat oven to 350 degrees, and line cookie sheet(s) with parchment paper. **Parchment paper saves a lot of time in cleaning up!**

1. Cream peanut butter, sugars, and butter together.


2. Add eggs, one at a time, beating until blended.

3. Add baking soda, baking powder, and vanilla

4. Mix in flour.


5. Roll dough into 1 1/2 inch balls, and then roll in sugar. Flatten cookies using a fork, in a criss-cross pattern. **Tip: I use a small ice cream scoop when making cookies. All the cookies will be one size and therefore help bake all the cookies evenly**


6. Bake cookies for about 7 minutes and let cool completely.


7. Microwave chocolate chips at 30 second intervals, stirring in between, until chocolate chips are melted.

8. Once melted, dip cookies in chocolate sauce. Put cookies back onto parchment-lined cookie sheet and place into freezer for about 15 minutes.


9. Take out of freezer and enjoy!